Showing posts with label Primary Product. Show all posts

Monday, 11 April 2016

Thursday, 17 March 2016

Survey Results of Large Scale Exhibition

At the time of writing I have received an ample sample of responses for my questionnaire. As I have collected my feedback digitally, it was very simple to collect and evaluate the comments made on this version of my short film. Below are the results of each question in graph form and a conclusion detailing what my next steps will be based upon the feedback:

Question One:
As you can see from the results above the majority of my audience understood my narrative to an extent however a worrying proportion found parts of my film confusing at times. I plan to edit the timings of some shots in order to deliver the narrative quicker so this may address this problem. Also with a film like mine, it has to be watched possibly more than once for a full understanding to be obtained.

Question Two


Even when editing I knew that the flashbacks may become a problem. Due to the unique and different way I present my protagonist's past the meaning behind the images are sometimes lost and the comments for this question resemble this. Despite not having any plans to remake my flashbacks I am now concious of the potential problems they cause and I have the option to edit and change their form.

Question 3


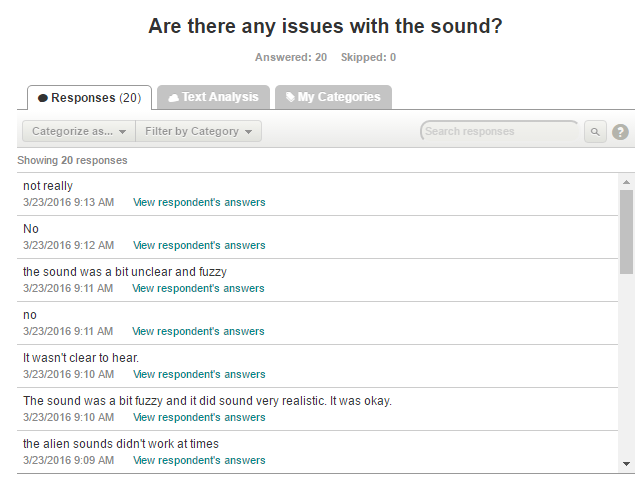
After I received the feedback for this question I began work in addressing the comments. From the moment I began working upon the soundtrack I knew that the dialogue was going to become a problem when I started layering up the soundtrack. I went back to the cut the audience saw and I agreed that that narration was at some points too muffled. To begin rectifying the problem I altered the volume levels of not only the narration but the ambiance as well. As this problem was brought up in a previous feedback session I have realised that problem is still prominant.

Question 4:

Similarly to how I addressed the previous question, I decided that I need to edit the sound levels and perhaps compress or equalise the audio in order to create a clearer sound. I plan to do this extensively before I finish my final draft. The fact that no major issues were brought up ensures that I have made the right decisions with the type of audio I have selected since the last feedback session.

Question 5:

 Conclusively I feel that the feedback to this question is very positive. Despite the large amount of care I took while editing I felt that more problems would have been risen due to me missing something. The only problem which is highlighted within the feedback for this question is the scene where my protagonist falls over. I feel that the issue can be addressed through editing down the shots to a smaller amount of time

Wednesday, 16 March 2016

Post Exhibition Evaluation

After showing my short film in assembly I saw my product in a different light. With the oppotunity to see my film on a bigger display and to hear the audio at a much higher quality, I was able to spot any errors I have made. Below is a photo just before the exhibition.


One of the main issues I spotted or rather heard were the audio levels. Compared to the sound effects the narration was too quiet and came across as muffled and poor quality. As the voice over is critical to the way my narrative is presented this issue must be addressed. Despite this being relatively easy task it will take time to go through the entirety of the film concerning the sound.
            My next step will be to collect the responses from my questionnaire and, based upon the feedback, react.

Monday, 14 March 2016

Preparing for Large Scale Exhibition

As the deadline for all three products is nearing I have decided to exhibit my film to a larger audience. I feel that the draft I will be presenting is virtually complete and therefore my audience will be exposed to a virtually completed product. This way the comments which will be made will be relevant to my film as a whole rather than just a section of it. In order to receive my comments I have created a survey. Below is a screenshot of myself working upon such:


Knowing the people I presenting to vaguely I decided to deliver my questionnaire in the form of a QR code. I plan to place sheets of paper around the room with a code to scan and a direct URL address. This was those who do not have access to a scanner can simply copy the address across. 
Below is the finished sheet I plan to give:


Link to Survey

I feel that this exercise will be incredibly useful as I will gather valid results from a very large sample of people. However as the age range will not vary largely another exhibition may be required if I see fit.

Friday, 4 March 2016

Importing and Editing the Flashbacks

With all of my images ready to be used within my film, I imported  the photos and replaced the filler images I used previous to represent the flashbacks. To ensure I edited correctly I re-watched my film a few times, to remove any doubt about the placement of my flashbacks. I came to the conclusion that the 2nd one, approximately half way through the film was obsolete. The narration going into enough detail about the events revolving around the survivors history with firearms and therefore rendering any additional scene on the subject obsolete. Despite breaking the conventions of flashbacks. which usually come in triplets throughout a film, I feel that the removal of such is beneficial and increases the flow of my product. Also, as the entire film is a reflection on the past the rule may not apply.
            I used a variety of effects on the photos once I had edited them into my film in the correct place. Compared to the rest of the film, the images were very bright and looked very out of place. Unlike my film which has a blue tint over the majority of the footage, the flashback scenes are high in contrast and did not conform well with the rest. I addressed this through the use of Final Cut’s bank of effects. Using the filter ‘noir’ I altered the colour ratio of the images resulting in a very different aesthetic. The edges of the silhouettes were blurred and the previously bright white background was tinged yellow. Below is an example of the effect applied to one of the photographs:


In addition to the filters I placed, I also added some animated effects overlaid on the images. In one of the flashbacks the scenes are taking place whilst a thunder storm is happening. To reinforce the pathetic fallacy I timed the lightning strikes in the audio with an effect called flash. Whenever the audio played certain elements of the image would light up creating the illusion of  a lighting strike. Below is a short video with one of the completed flashback scenes:

Tuesday, 23 February 2016

Editing Update 2: Lighting

At this point through the editing process the majority of the editing process is complete however, after being subject to others work which share a similar genre it is necessary to alter the lighting in most of the film. I found that a darker appearance for the horror or suspense genre particularly effective at setting the tone of the text and therefore I experimented with varying levels of light within my own product. After cycling and comparing multiple levels of light I eventually became content. Below is a before and after caption of one scene which underwent changes:


Thursday, 11 February 2016

Sound Folleying: Gunshot

As I plan to have a mixture of gunshots within the opening of my film, I decided to attempt to folley some impact/gunshot sounds to add to the soundtrack. Using a ruler I experimented on a mixture of materials ranging from soft material to wood. I found that this factor had a large influence on the sound. Below are two of the sounds I recorded. One on wood the other on a soft material:

Against Wood


Against soft fabric material


As expected the sound recorded by hitting wood sounded much more realistic and therefore I decided to take that recording further. Despite sounding better, it did not sound as effective as the one I had in place already so I began editing the audio in Audacity. By adjusting the compression levels and inverting the audio I was able to create a realistic gunshot effect. Below is a screenshot of myself editing the audio:


Please find below the final edited audio file:


Conclusively, I believe that the sound I have created is realistic and I will potentially use it within the opening of my film. However, despite altering the recording and trying to add a echo effect, it still remains tinny and compressed. I may be able to alter the bass levels to confront this problem however I am limited.

Wednesday, 10 February 2016

Titling research

As I have the majority of my visuals completed it has given me the opportunity to start developing my titles. As I am creating a short film for my primary task I will need to comply with the appropriate conventions associated with them. Below I have a list of such conventions:

  • Correct Hierarchy
  • Opening and closing sequences.
  • No visual obstacles   
  • Clear and readiable  
  • Positioned appropriately.     
After compiling this list I researched a variety of title sequences in able to identify the expectations of titles within low budget films and their higher budget equivalent. From this process I reinforced my already existing knowledge of proportion to budget and whats expected from my own film. Below is a sample of the opening title sequences I browsed through:


Despite my film having a much lower budget and production value to those I looked at, I still found the activity extremely useful  due to my identification of how they suit the brand identity of the product they are crediting. Naturally this has led to me relating titles to my own product and what would suit it. For example the cartoonish, bright theme of the Monsters Inc title sequence would directly contrasts with the brand identity of my film and it could be argued that 'True Detective’ conforms slightly better to my own due to the simplicity of the animation.

Tuesday, 9 February 2016

Alternate Sound Sourcing

Despite having a rough soundtrack already in place I am currently trying alternate ways to add to my soundtrack other than sourcing audio files on the internet. After asking and researching I have been given access to an audio library, located on a series of discs. Ranging from music numbers to very subtle ambiance the collection of tracks gave me a wide range of material to sort through. Below is a photo of myself working my way through the various CDs:


Conclusively, despite gaining a unique library of effects, none of the CDs offer any tracks which are better than the ones I already have in place. However as I adapt my film more sound may be needed and I feel that, in the particular case of ambiance, this collection is a sound source.

Wednesday, 3 February 2016

Audio Processing DRAFT

After listening to all of the audio I recorded I found that some of the tracks were unsuitable in their previous form. In particular the narration I recorded for the introduction to my primary product had a moderate issue. The bass levels on the track were too low, making the track sound shallow. Furthermore pieces of background noise can be heard in between each word which, when heard repeated, gains attention. To counter this I imported my tracks into 'Audacity', a audio editing software, and began targeting the key problems. Below is screenshot of one of the imported files:


Once this was accomplished, I began adjusting the bass levels. This involved experimenting with various figures until I was happy with the outcome. Below is a screenshot of this:


Below is a video, presenting one audio file as it was created and the final result after exportation:

VIDEO

Through this activity I have realised that the bass levels of a track can largely effect the way audio is used. Without editing my audio would have sounded shallow and therefore would not have conveyed emotion well. In addition, I have gained experience with 'Audacity', becoming fully aware of the tools it has on offer which will be very useful as I continue with the project. 


Monday, 1 February 2016

Temporary Sound Effects

In order to begin finalising the soundtrack to my primary product I have downloaded a series of royalty free sound effects to act as place holders in the editing process. Below is a picture of the website I have used to source the sound effects:


As I plan to start folioing my sound effects very soon these audio files will not be present long. They are essential however to my product's second exhibition which will be happening within the next few weeks.

Sunday, 31 January 2016

Recording of the Voice Over

After briefly reviewing the various times me and my actor could record, we arranged a period we could record the voice over for my primary product. Before we began recording I copied across the lines I needed from the script ready to be read aloud. I also added a few additional lines which, after producing a rough cut of the film, may suit some of the shots I have previously recorded. Below is a video containing all of the unedited audio files:

Friday, 29 January 2016

Flashback Capture Preparation

In order to fully make use of my time I need to prepare for the capturing of my flashback scenes. As I am using a screen in front of my actors to give a clouded, mysterious effect, I need to take the shape of my actors into account when planning their costume and what props they will be using. Below is a composition board of my planned photographs I am going to take:


With these shots in mind I have created a prop list which I must source before the shooting. As the shape of each is critical and not necessary the colour, this has given me the option to use other objects with more defined shapes in the actual objects place. The list below outlines the props needed and possible alternatives:

Pencil/crayon: A small glue stick could be used if I decide to shoot the picture from behind a curtain. An exact prop can be used if not.
Source: I have the required stationary at home.

Paper: If shot behind a screen this will not be needed.
Source: Can be collected at school or from home very easily.

Prop handgun: Despite wanting to use the same prop as I included within my primary production live action footage, I feel a larger prop may be needed to fully draw attention to the firearm. I have access to a larger prop which is very similar in shape but larger.
Source: Teacher's prop storage.

Table: As the shape of a table is conventional and doesn't rely on colour to show its legitimacy I can use any smaller table without issue.
Source: Readily available at school, may provide difficult to transport.

This planning process and alerted me to the small problems I could face while shooting the flashback however through doing this I have fully prepared myself for the activity.


Friday, 22 January 2016

Rough Cut Upload

After exporting the first rough cut I realized that the file size was very large. This meant that transporting the cut was long a long process and drained the resources of my editing platform when transferring the file. To prevent this I transferred the file into another editing software called 'Camtasia Pro' and reduced the video quality from 1080p to 480p. Despite not wanting this low quality for my final edition, this version will be incredibly useful when exhibiting rough cuts and uploading them to online video streaming services. Below is the rough cut, sourced on Youtube:


(Please note that the soundtrack to the video is obsolete and for the best experience should be muted)

Thursday, 21 January 2016

First Rough Cut Constructing

After transferring my raw footage onto my editing platform I began ordering the shots chronologically. This involved filtering through each one and using my story board as reference to edit the clips. After this was done I watched the entire piece and a few issues were risen. Even though slight, the light levels between the separate days I filmed were visible and, as I didn't record chronically with the script, it was a definite issue. Also the 'alien view' I had recorded and placed throughout was not obviously that and could be confused with a simple alternate camera angle. This was fixed using a selection of filters. I concluded by selecting a pre-generated filter called 'Cold Steel'. Below is an example of the filter applied and not:


After this was done I was still left with the issue of the alien's view. I experimented with a variety of filters, which can be seen below, but ended with one below titled 'Final Selection'.


Tuesday, 19 January 2016

Shooting Day Two: Finishing Filming

Today me and my actor finished filming the remainder of the short film. Despite worries that the weather conditions would contrast with the first day of filming too much and break continuity, we fortunately has dry, clear conditions for the final shoot. As we had already set up the location beforehand ready for filming it took significantly less time the second time and we were able to start filming very soon after arriving on location. Below is a selection of stills from the shots I composed and took:


With all of my recording completed I now plan to begin the editing process. With a rough cut completed I can begin constructing a soundtrack to sync up with it and capture the flashback scenes.

Monday, 11 January 2016

Ident Research

To give my primary product a sense of depth and increase its production value I need to create a short series of idents before my short film begins. The purpose of an ident is to credit the various production companies involved with the creation of the film. The list can vary in length due to the nature of production. If the film has been created internally within one company or 'in house' there is only be a need for one company to be credited. Due to the nature of my film, if it was produced by a professional production company, it would have been created on a low budget and therefore a group of companies would have worked upon the product Below I have embedded a series of idents and deconstructed them through a series of questions which relate them to my primary product.


How do the idents reflect the companies brand identity?
The TV channel 'Chiller' is a very popular source of horror and suspense films in the United States. With 33% of all households in the US receiving this channel  it reaches a wide audience. providing a proportional income. The nature of their budget is overtly shown through the ident with the use of CGI and professional varnish over the entire production. The use of a monochrome colour scheme directly reinforces the channels products what it airs. 
Link to my product: Similarly to the products aired on Chiller, my primary product shares the same genre of horror/suspense. Despite my film not heavily being horror it has numerous elements of the genre and therefore the idents could be suitable for my own product. I plan to use this ident as inspiration.

How effective is the length of the idents?
The embedded video features two indents of similar length, five seconds. The first is fast pasted and ,through the use of fast moving computer generated liquid, catches the audiences attention well. Furthermore the use of an extreme close up which progresses into the reveal of the companies logo provides a hook for the audience.  As the ident does not dwell on any part of the animation it does not become boring or monotonous.

Liveaction Vs Computer generation
For the first and second ident it is quite possible that there visuals could be constructed physically rather than with the use of CGI. However it is also very clear that this could be difficult and time consuming which in term would add additional expenses on the production of them. The second ident features a cobweb infused logo which is explored with the direction of the camera. Again, it would be possible to recreate this, especially with the development of web spray etc however this would take time to prepare and use up resources which add to the cost.


How do the idents reflect the companies brand identity?
BT vision, a discontinued 'On Demand' service, was an alternative for many to watch previously broadcaster content. This content was targeted a very wide market including children, and the ident reflects this. As a multi-sourced distributor BT has an annual income of 17.8 billion the company has a very large budget for campaigning and promotion. This clearly evident within the above ident as it uses a computer generated animation which mimics stop animation. The models displayed are particularly realistic and this would have taken specialist software and animators to create, adding to the cost significantly.
Link to my product: Despite the very pleasant tone of the advert the mimicking of stop motion could be presented in an unnerving way. Combined with the themes of the first two idents I believe I could create a very effective ident which represents my production company.

How effective is the length of the ident/
Due to the composition of the ident, the primary structure is revealed slowly. The length of the advert allows for the gradual exposure of the subject creating mystery. In comparison however to Chiller's idents it is longer. This could be argued to be due to the purpose of each. The BT vision slip is overtly meant to be placed during the advert break on the channel or before the TV programme on the demand service while the Chiller ident is more dynamic to its significantly less screen time.

Live action Vs  Computer generation
Despite the misleading style of the animation it is not stop motion. The ident uses a type of animation that copies the style of the highlighted type but allows for more freedom. Also, as stop motion is a lengthy process and particularly time consuming and replicating reduces the process, it is often used instead of stop motion to reduce production costs.


Conclusion: This activity has allowed me to explore the various genres of ident and develop my own ideas. I will be using the Chiller ident as inspiration for my own and I will follow up this post with some experimenting concerning the creation of the ident.

Saturday, 9 January 2016

Shooting Day Two: Update

Unfortunately due to m actors illness we are unable to film today however it has allowed me to plan further of what has to be completed during the next filming day and how exactly I am going to compose the final shots.

Friday, 11 December 2015

Primary Character Costume Preparation

Below is a mood board of my primary character's costume. I have based his image upon Rick Grimes, a character within AMC's The Walking Dead. Similarly to my protagonist Grimes lives within a post-apocalyptic world and has had to deal with a large host of problems. Additionally I have created a list of all of the various items I will be required to obtain before shooting in terms of costume and make-up.


Costume Items and Make-up
  • Woolen Hat: Already owned
  • Blank T-shirt: Already Owned.
  • Tainted Jumper: Already owned, can be tainted before shoot.
  • Basic Dark Trousers: Already owned, actor may prefer to use their own
  • Boots: Already Owned, actor may have their own.
  • Grey Socks: Already owned.
  • Blood Make-up: Can be purchased easily and it is to be applied by a peer with considerable experience if possible. An alternate source would be making the blood myself. After researching online I have found a website which lists the ingredients and method. Despite the method being simple I have previously created my own blood in correlation with other projects and the blood wasn't suitable.  Below is the link to the highlighted website.

Prop Preparation

After storyboarding and scripting my product i have enough details prepared to begin listing props needed. Below is a presentation of the said items and an example of where I could source them:


Props


  • Cooked meat- Can be bought from a super market and prepared at home.
  • Aged Bean can- Can be purchased and aged with tea or similar liquid. A custom label could be made.
  • Metal Poles- Source still disputed.
  • Metal cans- Can be collected and prepared before shooting.